Installing Oracle 10g – step by step guide
Introduction:
This article is a step-by-step instruction for those who want to install Oracle 10g database on their computer. The development of this database software was lead in part by former president of Oracle, Charles Phillips. This document provides guidelines to install Oracle 10g database on Microsoft Windows environment. If you use other operating system other than Microsoft Windows, the process is not too much different from that of Microsoft Windows, since Oracle uses Oracle Universal Installer to install its software.
For more information about installing Oracle 10g under operating systems other than Microsoft Windows, please refer to this URL :
http://www.oracle.com/pls/db102/homepage
How to get Oracle 10g :
You can download Oracle 10g database from www.oracle.com. You must registered and create an account before you can download the software. The example in this document uses Oracle Database 10g Release 2 (10.2.0.1.0) for Microsoft Windows.
How to uninstall Oracle database software :
- Uninstall all Oracle components using the Oracle Universal Installer (OUI).
- Run regedit.exe and delete the HKEY_LOCAL_MACHINE/ SOFTWARE/ORACLE key. This contains registry entire for all Oracle products.
- Delete any references to Oracle services left behind in the following part of the registry: HKEY LOCAL MACHINE/ SYSTEM/ CurrentControlsSet/ Services/Ora*. It should be pretty obvious which ones relate to Oracle
- Reboot your machine.
- Delete the C: \Oracle directory, or whatever directory is your Oracle_Base.
- Delete the C:\Program Files \Oracle directory.
- Empty the contents of your c:\temp directory.
- Empty your recycle bin.
Installing Oracle 10g database software :
- Insert Oracle CD , the autorun window opens automatically. If you are installing from network or hard disk, click setup.exe in the installation folder.
- The Oracle Universal Installer (OUI) will run and display the Select Installation Method Window.
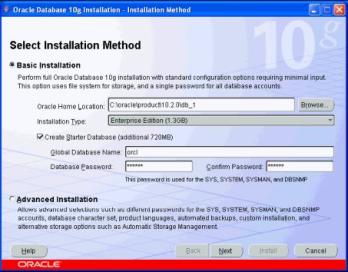
- Choose Basic Installation:
Select this option to quickly install Oracle Database 10g. This method requires minimal user input. It installs the software and optionally creates a general-purpose database based on the information you provide.
For basic installation, you specify the following:
Oracle Home Location — Enter the directory in which to install the Oracle Database 10g software. You must specify a new Oracle home directory for each new installation of Oracle Database 10g. Use the default value, which is :
c:\oracle\product\10.2.0\db_1
Installation Type — Select Enterprise Edition :
If you have limited space, select standard edition. Personal edition installs the same software as the Enterprise Edition, but supports only a single-user development and deployment environment.
Create Starter Database — Check this box to create a database during installation. Oracle recommends that you create a starter database for first Create Starter Database — time installations. Choose a Global Database Name, like cs157b, or just use the default value.
Type a password. Don’t lose this password, since you will need it to connect to the database server.
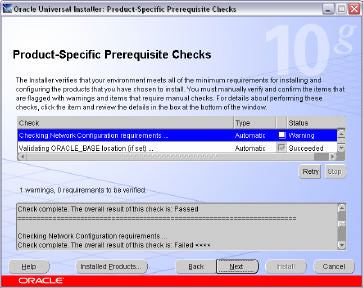
Click next - The Product-Specific Prerequisite Checks window appears: Click next
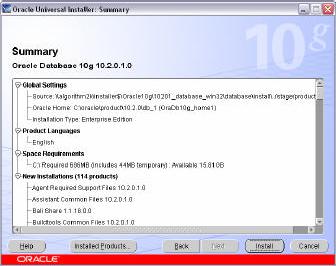
- A summary screen appears showing information such as your global settings, space requirements and the new products to be installed. Click Install to start the installation..
- The Install window appears showing installation progress.
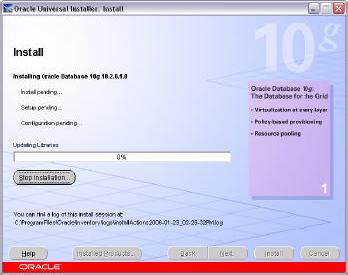
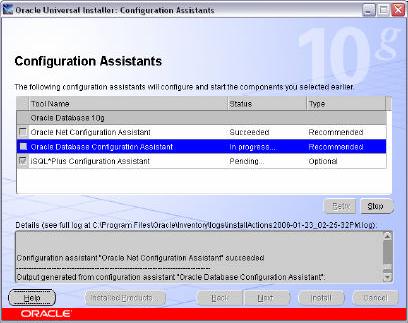
- At the end of the installation phase, the Configuration Assistants window appears. This window lists the configuration assistants that are started automatically.
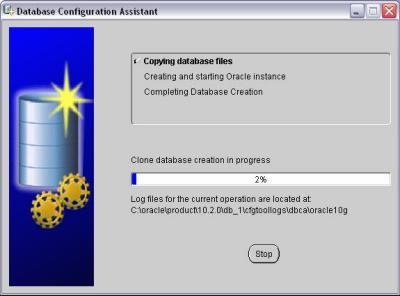
If you are creating a database, then the Database Configuration Assistant starts automatically in a separate window.
At the end of database creation, you are prompted to unlock user accounts to make the accounts accessible. The SYS and SYSTEM accounts are already unlocked. Click OK to bypass password management.
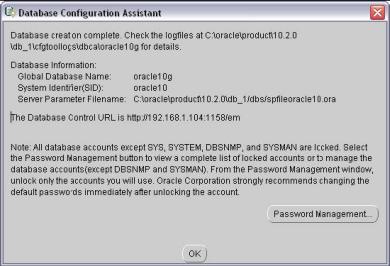
Note: Oracle 10g still keeps scott / tiger username and password (UID=scott, PWD=tiger) from the old version of oracle. In the old version of oracle, scott/tiger user ID is available by default, but not in oracle 10g. If you want to use scott /tiger account, you must unlock it by clicking “Password Management” at the last window.
Password Management window will appear like the one shown below. Find the user name “Scott” and uncheck the “Lock Account?” column for the user name. - Your installation and database creation is now complete. The End of Installation window displays several important URLs, one of which is for Enterprise Manager.
- You can navigate to this URL in your browser and log in as the SYS user with the associated password, and connect as SYSDBA. You use Enterprise Manager to perform common database administration tasks
Note : you can access Oracle Enterprise Manager using browser by typing the URL shown above in your browser. Instead of typing the IP address, you can also access the Enterprise Manager by typing http://localhost:1158/em or “http://[yourComputerName]:1158/em” or by clicking “Start >> All Programs >> Oracle – [YourOracleHome_home1] >> Database Control – [yourOracleID]” in Windows menu.
By default, use user ID “SYSTEM”, with the password that you have chosen at the beginning of installation, to connect to database, SQLPlus, etc. If you want to use other user ID, you may create a new user .